Saturday, April 12, 2014

Smitten Polish ~ Love Is Actually All Around


Smitten Polish ~ Love Is Actually All Around
Red linear holo

I bought Love Is Actually All Around at the same time as I bought I Never Drink… Wine, that I showed you yesterday. I was honestly unsure whether I really wanted this or not, because I couldn’t really figure out if this was a true red holo or not. I might as well spoil the surprise right away: It’s not a true red holo. It is gorgeous nonetheless, and let me show you what I’m talking about.

The formula is good, and application was a breeze! The polish dries fast and it takes two coats to make it look its best.

And here’s the pictures taken with a flash. There’s no topcoat involved just yet:


It looks great, doesn’t it?


The holo flame is amazingly beautiful!


Here’s a picture taken in my lightbox without flash. This shows that we’re not dealing with a true red. There’s a hint of something else. I hesitate to call it brick red, but… yeah… Judge for yourself:


I paired it with a Chirality polish: Cu2+, which is a lovely blue holo – it’s my favourite Chirality. I showed it in this post. I painted three stripes on each nail – a long, a medium and a short, starting from the base of the nails. I topped it with a layer of Ellagee’s topcoat Glass. And here’s a flash picture of the final mani:


And another one. I love these two colours together.


Here’s a lightbox picture.


 The pretties:


Oh yeah, I am glad I decided to buy Love Is Actually All Around too! What do you think of this?


Number of coats: 2
Drying time: Really fast
Finish: Strong linear holo
Overall impression: Really cool colour – but not true red, the holo effect is great, and the drying time is really something!!
Buy again: Yes

You can buy Smitten polishes from Edgy Polish – they ship internationally.
You can find more info on Edgy Polish’s Facebook page, link here.

Friday, April 11, 2014

Smitten Polish ~ I Never Drink… Wine


Smitten Polish ~ I Never Drink… Wine
Deep wine red linear holo

When I first laid eyes on this polish, it was sold out – both from Smitten Polish themselves and from Edgy Polish. I feared that it was going to be discontinued, but fortunately it wasn’t! I love deep wine red polishes you see, and holos in particular. You must know that by now.

Anyway, application was a bit of a challenge. The formula is thick, which I usually don’t mind at all. But this polish dries really fast, which means you don’t have many brush strokes to make it look pretty. I did ok I think, but I didn’t do great. But anyway, as I said, drying time was fast, and the pigmentation good. Two coats is what it takes.

Take a look at how beautiful I Never Drink… Wine is. Two coats, no topcoat, the picture is taken with flash:


Is that gorgeous or what? I think it is!


Here’s what the polish looks like outside the flashlight. It’s still really pretty, and the holo particles show up like little shimmers. I love that.


I stamped on it. I used a motif from the stamping plate Apipila02 and I stamped with Color Club’s Halo-Graphic from the gorgeous Halo Hues collection. I love the entire collection, and I might get the few I miss soon.

Here’s the final mani taken with flash:


And a non flash picture:


I think the polish is a bit too thick to manage, so next time I’ll wear it I will add a few drops of thinner – I am sure that will help. The colour is no less than gorgeous and the linear effect is just as in yer face as I like it to be.


Number of coats: 2
Drying time: Ridiculously fast
Finish: Strong linear holo
Overall impression: Fantastic colour, I love the holo, and the drying time is amazing!
Buy again: Yes

You can buy Smitten polishes from Edgy Polish like I did – they ship internationally.
You can find more info on Edgy Polish’s Facebook page, link here.

Thursday, April 10, 2014

Darling Diva ~ Green Diamond


Darling Diva ~ Green Diamond
Green holographic

I made my boyfriend pick the colours for my nails today, and he went for green straight away. Clever man! I picked 3 greens from my box of untrieds and let him pick again. Green Diamond is the one he chose. Good choice – I’ll show you why in a moment!

The formula was pretty difficult to work with. The polish is so heavily pigmented that the formula is really thick and relatively fast drying. that means that you don’t have many brushstrokes for each nail before it all turns to crap. And the polish is not self levelling either. I think I managed pretty well anyway. It’s a one coater, but I applied a second coat to see if that would level out the irregularities the formula had left me with. It didn’t at all. It’s dried up to a semi matte satin finish. Nice!

But anyway, Green Diamond is so pretty, and I honestly think that a bit of thinner will solve some of the problem with the formula. We’ll see about that next time!

Here’s what two coats look like. There’s no topcoat involved just yet.


These pictures are taken with flash. Green Diamond is described as a linear holo, but I think it looks like a mix between linear and scattered.


Last flash picture.


The polish is also pretty outside the flashlight.


I stamped on it. My boyfriend chose a motif from stamping plate DRK-B and I stamped with Sally Hansen Insta-Dri “Jumpin’ Jade”, which is a gorgeous dark green. I applied a layer of Ellagee’s topcoat “Glass” and here’s my final mani photographed with flash:


It’s amazing what difference it does to the underlaying colour to have the darker green on top.


And a non-flash picture for you:


Here are the two pretties plus the topcoat I used:


I have to say that I totally love this mani. I find myself staring at my nails at all times, LOL! I wonder if you like this as much as I do! Please do tell me in the comments below.


Number of coats: 2 – but 1 would have been enough
Drying time: Very fast
Finish: A mix between scattered and linear holo
Overall impression: Oooh, I love the colour and the way the holo works!
Buy again: Yes

Wednesday, April 9, 2014

Something about Rainbowify Me


I joined a nail art group recently. The purpose was to be challenged  polish and nail art wise. Unfortunately I felt I had to leave the group before it even started. I had already made the first mani though, and there is no reason why I shouldn't share it here on my blog anyway. The first challenge was "Something about #insert blogger name here#"


So here goes:


My love for polish started many years ago, in my early teens. I have always loved shiny things and things that glitter.

I’m not into dull colours, I like it when the colours really pop. Nature is amazing when it comes to colours, and some of the most beautiful things that never fail to amaze me are rainbows. So once I finally got into blogging 2½ years ago, it wasn’t hard for me to chose a blog name: Rainbowify Me.

Call me Captain Obvious: I chose to make a rainbow mani.


 I used 8 different polishes for this mani. I started out with OPI Alpine Snow. I only applied one coat, because all the other colours cover really well in themselves.


I tried the method of masking around the nail with peel-off base coat, even though my earlier attempts hadn’t worked that great. I tried with Isadora’s peel-off basecoat this time and it worked somewhat more successfully, even though I find it really tough to make the peel-off stuff cover the cuticles without touching the nails.


I love gradients, but I am so bad at the cleaning up part afterwards, so I really want to figure out a way I can get around the clean up thing.


Here are all the polishes I used:

OPI: Alpine Snow. Sally Hansen Insta-Dri: Just in Lime!, Lightening & Orange Impulse. Pretty Serious: Santa’s Sunburn & Into Dreams. Essence: I’m a Marine Girl. Orly: Shine on Crazy Diamond
Which kind of mani would you have chosen to make?

Tuesday, April 8, 2014

Glittering Elements ~ Blue Topaz


Glittering Elements ~ Blue Topaz
Sky blue holo

Blue Topaz! It’s sky blue and the holo effect is really nice! Wait and see!

Blue Topaz has got the same good formula as the rest of the polishes I received, and it’s also a two coater. Drying time is really good, no worries in that department at all. Nosirree bob.

See how pretty it is: Here’s two coats, no topcoat, pic taken with flash:


Oh yeah, I love that holo goodness!


And this is what it looks like in lower lights. Still a really pretty colour!


I found some stickers I’ve had laying around for quite a while. I put two stickers on each nail and topcoated it to make it last for just a day. Here’s your flash picture:


The topcoat didn’t help though. The stickers didn’t want to stay flat, so I ended up picking them off after like about an hour. Silly me! :/


Verdict:
Blue Topaz has got a really nice home here, along with all her sisters in the Helmer. She likes it here, and I like having her here. ‘Nuff said! ;)

Glittering Elements ~ Burning Desire


Glittering Elements ~ Burning Desire
Very dusty pink holo with gold shimmer

I love being on a Glittering Elements roll – it’s fun!

I had a hard time describing the colour of Burning desire, and dusty pink is the best I could come up with.

Again: No problems with the formula, the pigmentation or the drying time, everything just work perfectly. Two coats is what it takes to make this baby opaque.

Here is two coats, no topcoat, picture taken with flash:


I really like when it looks as if the polish glows from within. It’s a very special effect!


Here’s a low light picture:


See what I mean when I say “dusty pink”?
I decided to match it with Rain Dancer, which I showed you here. I painted two stripes diagonally on each nail, and here’s what that looked like on a flash picture:


And a low light picture that shows how well those two colours really go together!


Verdict:
Burning Desire surprised me positively. I was suspicious because of the gold shimmer, but it didn’t turn up overwhelmingly much, so that is just fine. I love the holo effect, it’s simply amazing! Yes, I can recommend this polish!

Monday, April 7, 2014

Glittering Elements ~ Rose Thorn


Glittering Elements ~ Rose Thorn
Dusky pink holo

Here’s another Glittering Elements polish. It’s pink and it’s holographic! It sounds good already, doesn’t it!

The formula is great, no problems to report at all. It takes two coats to achieve desired opacity, and the drying time between the coats is fast. And girl, this polish is beautiful!

Take a look at two coats, no topcoat, picture taken with flash:


oooooh, I like that holo goodness!


This is a really interesting finish – it’s like a mix between linear and scattered holo.


Here is a low light picture. It’s still a cool colour!


I stamped on it! I found some rose motifs on two different stamping plates: The XL plate “H” and an old Essence plate. I stamped with a black no name stamping polish. I applied a layer of Ellagee’s Glass topcoat and here’s the final mani taken with flash:

And a low light picture:


Verdict:
I like this so much more than I imagined I would. The polish is pretty in low lights, and it’s amazing in the sunshine. Polished thumbs up from me!!

Musical Mani Monday, week 8: Timbaland ~ The Way I Are


I’ve been giving this week’s challenge a lot of thought. I think that’s one thing challenges are really good at: They make you think about your manis instead of just doing them heedlessly.

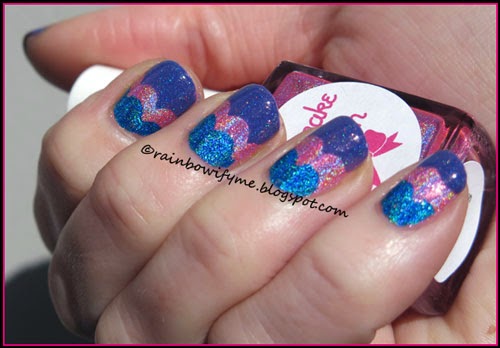
Let me show you the result of this challenge. This is The Way I Are:


How did I end up with that result, you might ask yourself?
  
If you have been around for a little while, then you’ll know that I love glitter. The sparklier and shinier the better, which is also why holos have taken up so much space on my blog lately. I love blingy things so much that my boyfriend often says that I must have been a peacock in a previous life. Oooo, I like peacocks, they’re beautiful! I would love to have been one!

Here’s the picture that inspired me:


I considered making this a dotting mani, but I changed my mind at the last minute.


I made this by cutting the pattern with craft scissors and then taping onto my nails.


I thought it was appropriate to make this an all holo mani. I did consider glitter too, but ended up with peacock green glitter, and that wouldn’t have matched any of these colours.


Here are the polishes I used:

Cupcake Polish: Los Angeles, Ellagee: Living Just As Free As My Hair, Colors by Llarowe: Young Turks

And that’s the way I are. 


This was the eighth challenge in my Music Mani Monday. Stay tuned next week to see how I interpret Set Fire To The Rain with Adele. I promise you it won’t be boring!  

Check out what the other girls made on their nails: