Thursday, December 19, 2013

Ozotic ~ 621


Ozotic ~ 621
Red scattered holo

I can’t believe there’s only five days till Christmas! It’s amazing how fast December went!

What is more Christmassy than a lovely red polish glittering with a scattered holo effect? That’s my kind of Christmas red for sure – and Ozotic 621 is exactly that!

I’ve shown it here before, but it’s beautiful enough for a re-visit in my opinion. Two easy, fast drying coats, and man, this baby can really shine! The holo shines from deeply within even in low lights – it’s an amazing polish for sure! No need for an aqua basecoat – I just used my regular one without any problems whatsoever.

Look at how two coats, and no topcoat shines:


I am totally and utterly in love with this red. If I could only keep one of my reds, this would probably be it!


My nails are ready for Christmas now, and so am I!


I wanted even more Christmas on them though. And I wanted to be a bit more creative than “just stamping”. I taped two of my nails across and painted a green stripe across with Zoya’s Logan, a lovely green Christmas shimmer. I freedhanded white lines around the green line. I dapped a bit of Nubar’s White Polka Dot on the tip of my pinkie, and then I found some nice Christmassy designs on Moyou London’s stamping plate Christmas Collection-03. I used Sally Hansen Insta Dri Whirlwind White.

Here’s the first four fingers:


And here’s a last pic, where you can also see the candy canes on the thumb.
There’s no topcoat on my middle finger and my thumb, because 621 is a bleeder, and when the topcoat applies, she turns the white stamping polish pink.


Here’s the collection of polishes I used:


You can buy Ozotic from norwaynails.com
You can find more info on NorwayNail’s Facebook page, link here.

Norway Nails have kindly offered my readers a 10% discount code. Just use the code RAINBOWIFYME10 at checkout, and you'll be getting 10% off your purchase.

Wednesday, December 18, 2013

Orly ~ Star Spangled


Orly ~ Star Spangled
Red jelly with red microglitter

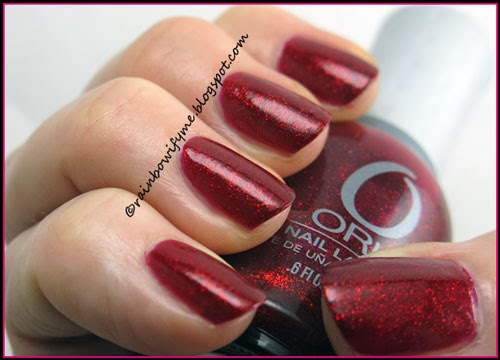
I was going to a big event at work, and wanted to play it safe and classy, nail wise. So I pulled out an oldie but goodie from “In The Navy” Collection from summer 2010; namely Orly’s Star Spangled. It’s a classic red jelly packed with red microglitter. It’s related to the polishes mostly named after ruby footwear – you know which ones I’m talking about.

Anyway; the formula is really good, and so is the drying time. I started out with two coats, but remembered that last time I actually wore it, I wasn’t satisfied with what it looked like on pictures after just two coats, so I applied a third coat. And I tell you, it’s totally worth the extra coat!

I applied a layer of Quick Dry & High Shine topcoat from Catrice, and take a look at how pretty this is:

Orly ~ Star Spangled

Isn’t that just perfect when you like glitter and still want it to be classy?

Orly ~ Star Spangled

I added some glitter, because I think that everybody needs a little bit of sparkle in their life! I used a Revlon glitter called Stunning, which is a clear base with silver and holo glitter and hexes. I sponged that onto my tips, and sealed the whole thing off with a layer of Poshé topcoat. Here, dear girls, is the final mani:

Orly ~ Star Spangled

And taken from a slightly different angle:

Orly ~ Star Spangled

This was just what I wanted it to be! Yay!

Orly ~ Star Spangled

And here are the pretty polishes:


I like to experiment, but sometimes it’s nice to play it safe, and make a mani that you just know is going to work out exactly the way you want it to.

So yes, this is a win in my book. Is it also a win in yours?

Tuesday, December 17, 2013

Linda Johansen ~ Twilight Magenta & London Fog


Linda Johansen ~ Twilight Magenta & London Fog
Dark purple with shimmer & Dark grey crème

Today there’s only one week to Christmas, and I’m beginning to get really excited! If we take a look at what Norway Nails has in the Christmas calendar today, you might get excited too!

It’s Linda Johansen – a great quality Norwegian brand, one that I’ve become very fond of!

Let me show you the last two I bought: Twilight Magenta and London Fog. The formula is just great, nothing negative to report about that at all. It covers well, spreads out easily and dries pretty fast. I used two coats of each for this mani. I’m totally in love with Twilight Magenta, that dark purple shimmer just makes me sit and gaze at my nails. And man, can both these babies shine!

Take a look for yourself; here’s two coats of each, no topcoat:


See what I mean? And these two colours really work together! Here I’m holding both of the bottles:


London Fog is such a good grey. I like the coolness of this colour, and it’s really easy to apply, even for a crème ;)


Here’s a picture taken in my lightbox:


I put on a layer of China Glaze “Fairy Dust”, which is a hologlitter in a clear base. I’m going to stamp on it all in a minute, and I want some of that holo to shine through! Here’s what it looks like:


I actually prefer Twilight Magenta without the hologlitter, but I think it really adds to the grey! And now for the stamping! I used a Christmas sweater motif from Moyou London’s stamping plate Christmas Collection-04, and I stamped with Sally Hansen Insta-Dri “Whirlwind White”, which is a great white crème for stamping. I topped the entire thing off with a layer of Poshé topcoat, and here, dear ladies, is my final mani:


This stamping plate only has XL motifs on it, and they’re way too big for my relatively small nails. I’m using approximately one quarter of the motif on my nails here:


I am so pleased with how this mani came out. I love the two colours together, and I think this stamp is really cool. It is indeed time for warm sweaters!


You can buy Linda Johansen polishes from norwaynails.com, and they're on special today! You get 20% off if you buy them from Norway Nails - but only until the next offer is up, so hurry!! I can easily recommend this brand, they’re really great quality polishes.
You can find more info on NorwayNail’s Facebook page, link here

Norway Nails have kindly offered my readers a 10% discount code. Just use the code RAINBOWIFYME10 at checkout, and you'll be getting 10% off your purchase. 

Monday, December 16, 2013

Liquid Sky Lacquer ~ Iris Illusion


Liquid Sky Lacquer ~ Iris Illusion  
Thermal holo that shifts between purple and sky blue

I have been looking forward to showing you this spectacular polish! It’s been a while since I bought it, and the reason I’m showing it today is that Norway Nails has a special offer on them today. I thought that would be a totally appropriate reason to actually wear the polish!

The formula is great, I didn’t experience anything but easy application and good coverage. It took two coats to reach full opacity, and drying time between coats is good. No problems to report at all. Top notch.

It’s winter here, and my fingers are almost always cold. This is what the polish looks like on cold hands. Two coats, no topcoat:


That is such a lovely purple, I love it! I had to play with water in order to show you the colour change – I can’t change the temperatures of my hands any other way.

On this picture I’ve held my pinkie and my ring finger under the warm tap:


Here’s a picture that shows you the colour change. My fingers refuse to stay warm, haha!


I stamped on it! I used a motif from a Moyou London stamping plate called Christmas Collection-03 and I stamped with Kiko #616 Silver from their Mirror collection. I finished the whole thing off with a layer of Poshé topcoat. Here’s the final mani – my fingers are still cold, hence the purple:


I stuck two fingers under the warm tap again. I love this picture:


I totally love both the colours!


Here’s an attempt of warming my fingers up, so I can show you a completely blue mani.


My hands refuse to cooperate though, they keep getting cold, hahaha!!


I love pretty much everything about this polish. It’s not just fun under the tap. It’s holo, both the colours are cool, and yeah, it’s basically just a winner! Please tell me what you think of this in the comments below. Thanks! :)


Opacity: 8/10
Colour, prettiness: 9/10
Durability: 8/10
Value for money: 8/10
Overall: 8.5/10
Buy again: Yes

You can buy Liquid Sky Lacquers from norwaynails.com, and they're on special today! You get 30% off if you buy them from Norway Nails - but only until the next offer is up, so hurry!!
You can find more info on NorwayNail’s Facebook page, link here

Norway Nails have kindly offered my readers a 10% discount code. Just use the code RAINBOWIFYME10 at checkout, and you'll be getting 10% off your purchase.

Delush ~ Ocean Sapphire


Delush ~ Ocean Sapphire
Sapphire blue jelly with iridescent glitters as well as hologlitter

16th of December, I’m getting excited now! I’m beginning to really look forward to Christmas!

Today I’m going to show you a gorgeous blue polish. Ocean Sapphire is the first polish I’ve got from Delush, so I was quite excited to try it out.

It’s a jelly, meant for either using on its own or layering over another polish for effect. I like to find out how my polishes work on their own, so that’s what I was going to do.

Jellies require a bit of patience - but I can assure you that it’s totally worth the effort. It takes three coats to reach full opacity – three easy coats. Drying time is pretty average, so no problemo in that department. And man, this baby can really shine.

Here’s three coats, and a layer of topcoat:


Ocean Sapphire is the perfect name for this pretty polish.


If you look closer you can see the hologlitter shine too. It’s sooo pretty!


See what I mean?

 
Here’s one last picture for you:


This reminds me of the most beautiful glittery ocean on a beautiful summer day. It’s beautiful and shiny and almost invites you to dive in. Yes, I really like this polish! So based on this one experience with Delush I’d say thumbs up! :)


Opacity: 5/10
Colour, prettiness: 10/10
Durability: -/10
Value for money: 8/10
Overall: 8/10
Buy again: Yes

Sunday, December 15, 2013

Gloss ‘N Sparkle ~ Edge of the World


Gloss ‘N Sparkle ~ Edge of the World
Dark teal jelly base with micro hologlitter and blue and green glitters and hexes

There’s only nine days until Christmas now. It’s amazing how this month has just passed.

‘Edge of the World’ looked really amazing on pictures, so I couldn’t wait to see if it lived up to my very high expectations. I’ll reveal that at the end of this post.

I am not the best of friends with jellies, but this one actually behaved quite nicely. The glitter is quite chunky and there’s quite a lot of it, so I had to be careful to get the paint all the way to the edges of my nails without getting it all over my cuticles. I managed that quite well, and I give all credit to the polish for behaving nicely. The polish is on the thick side, so it covers quite well. It only took two coats to reach desired opacity. The downside of the thickness is that the drying time was on the slow side. I did manage to sit through the drying time between layers though! :D

I applied a layer of Poshé topcoat, and my mani was done.


I can only say Oh.My.Gawd!! I Absolutely.Love.This!


I love, love, love the way the glitters swim around in the dark base.


I can easily forgive the slow drying time when the polish ends up looking like that on my nails!


Can you see the depth of it? It’s amazing! My pictures don’t even do it justice.


One last picture, just because I took so ridiculously many.


I guess it isn’t a secret that this polish lived up fully to my expectations. I love that the base isn’t just black, but actually dark teal. The glitters and hexes are so beautiful, and the added holo microglitter just makes this polish pretty close to perfect.

Is this a polish you’d wear? And have you got a trick that makes polish dry a bit faster? If so, please do share in the comments below, and I’ll be forever grateful! <3

Opacity: 7/10
Colour, prettiness: 9/10
Durability: -/10
Value for money: 10/10
Overall: 9/10
Buy again: Yes

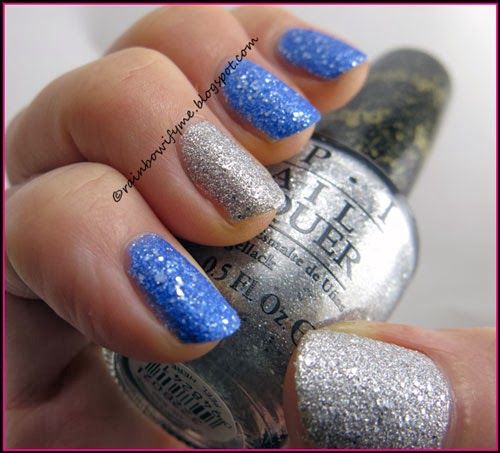
OPI ~ Kiss me at Midnight & It’s Frosty Outside and a rant!


OPI ~ Kiss me at Midnight & It’s Frosty Outside
Blue with silver glitter & Silver with silver glitter – both liquid sands

I bought these two polishes, which are both from the Mariah Carey holiday collection of 2013, in New York. I usually buy my OPI polishes on evilBay, but it was nice to be able to actually see the polishes in real life before buying them. If I had only looked up on-line swatches, I probably wouldn’t have bought the silver, so I’m glad that I got to see them "in the flesh" first.


One of the problems with seeing colours/swatches/manis online is that a few people enhance them, to make them look nice in their blogs. That’s bad style, and is telling the rest of us visual lies. I’ve seen them (we all have) and have sometimes been disappointed when I’ve subsequently bought the product, having been ‘turned on’ by the visuals. Well – it’s not the product’s fault, it’s the bloggers who enhance the colours, to make us viewers think their fingernails look better than they really do. Don’t let your ego get in the way of a supposedly factual review! Nobody will respect you or your blog, when they actually get to see in real life the product you’ve enhanced to pretty up your post(s).


Here’s an example : I was sent a polish to review, and of course checked around to see what other info was out there about the target polish. I found another review of the exact polish I had in my hand, and girls – those other review pics were nothing like the-polish-in-real-life. I continued and applied "my" polish, and finished & published my review.


Many times I’ve looked at the "other" review and – because I’m good with Photoshop myself, it’s part of my real-world job – I can tell that it had the colours & tones majorly enhanced, the fingers were cleaned up (although nothing wrong with that per se) and the whole post presented the polish in a totally false light - although admittedly it looked very pretty indeed. If I’d have purchased on-line, on the strength of that other review, I’d have thought I’d received a totally different polish.


Let’s not forget that when we make review posts and show off our pretties, others are judging the product to see if they want to buy it – and they will not be happy with us if they find that we’ve played with the reds and blues etc. to make it look pretty on our fingers, and by doing that, have taken away the trueness of the polish. 


Anyway. Rant over, and movin' on: I applied two layers of each of today’s polishes on my nails. The formula was really good and the drying time too! It actually covered after the first coat, but the second coat made it just a little bit better and totally worth it.


Take a look what two layers and no topcoat look like:


I love that there’s silver glitter in the blue, and also bigger chunks of silver, in the silver!


Then I stamped on it. I used Essence’s “I’m a Marine Girl” from their (now old) 50’s Girls Reloaded collection. I used a motif from my Apipila02 stamping plate. And here’s what that end up looking like:


If you take a closer look, you can see that there’s a blue stamp on the pinkie too! That was a mistake I made because I stamped without thinking! It actually looks pretty cool, so I decided to just leave it like that!


I have got a new XL stamper, and this is the first time I’ve used it. It’s not as squishy as the old one - and it feels as if it isn’t just as easy to pull on the stamps, or squash out the broader parts of some designs. I hope that I’m going to like the new one more than I liked the old one. I never quite became friends with the old one. Like stamping with a fat ol’ caterpillar!


Here are the three polishes I used. Look at all the silver glitter in the blue OPI; I really like that!


That’s today’s mani for you. I hope you like it as much as I do!


Opacity: 9/10
Colour, prettiness: 9/10
Durability: 8/10
Value for money: 8/10
Overall: 8.5/10
Buy again: Yes  

Saturday, December 14, 2013

Maisie Shine and Pahlish in a Christmas mani


Two times Naughty and one times Nice in the Great Wide Open
Maisie Shine Naughty and Nice, Pahlish Great Wide Open

I’m in the mood for Christmas manis now. Christmas is so close, and my anticipation grows each day. I’m very young at heart when it comes to Christmas.

I wanted to try out Naughty, which is a metallic red with red glitter, and Nice, which is a green metallic with green and teal glitter. And then Pahlish Great Wide Open, which is a creamy white base with lime green metallic hex/squares, faint teal shimmer, and scattered multicolor confetti and dots.

Coverage was best on the green and the red metallic obviously; I was satisfied after two pretty fast drying coats. The white required three coats to be opaque. The glitters in the white are very sparse, and I’m sure that is intentional! I ended up applying a third coat to the red and the green, just to be completely sure it looked good, and for something to do I was waiting for the extra layer of white to dry haha!

Let me show you what my base looks like. Here’s three coats of each, with a layer of topcoat on top:


It was only when I saw the polish on my nails that I realized that the glitters in the green metallic are also teal. I thought they were all green!


Let’s make it more Christmassy! I stamped on it, using my XL stamping plate K with holidays design on it. I stamped with Sally Hansen Insta-Dri polishes: Whirlwind White and Jumpin’ Jade, and dotted the berries with Wined Up. I finished my mani with a layer of Poshé topcoat, and here it is:


I really like the green stamping over the white – I’ll definitely try stamping some more over pale base colours like this.


Here’s a close up of my thumb:


Have you got something interesting on your wishlist this year? Please do share in the comments below :)